First we need some information...
In order to connect you to our OUTTRA systems, we first need some information. If you have not already done so, please fill out our merchant onboarding form.
After that you can continue with the next step:
To set up the interface in Shopware
The basis for data provision is provided by shopware 6 out of the box with the sales channel "Product Comparison" (https://docs.shopware.com/en/shopware-6-en/Productcomparison) and the "Dynamic Product Groups" (https://docs.shopware.com/en/shopware-6-de/Catalogues/Dynamicproductgroups).
Below is a step by step guide to setting up a data feed for use with OUTTRA from Shopware 6 using the Product Comparison option.
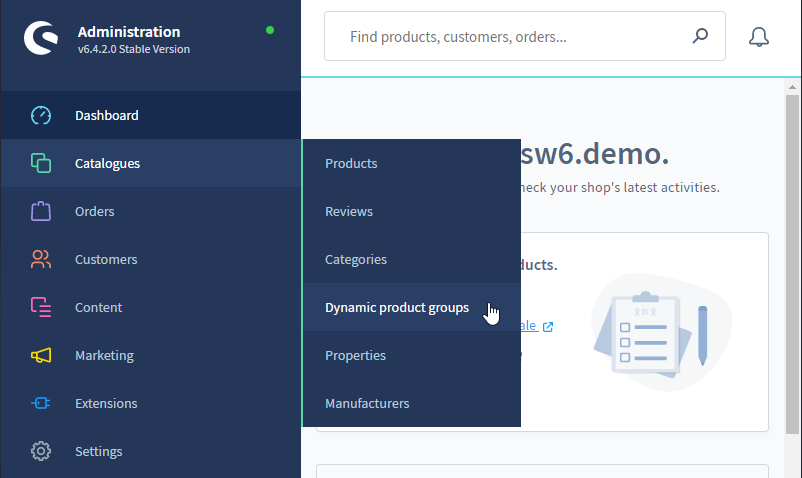
In order to be able to set up the product comparison OUTTRA export as a sales channel, you must first create a dynamic product group, which in the further course, will be used as a data source for the export.
Therefore, open the administration for "Dynamic product groups" in the showare 6 backend under Catalogs > Dynamic product groups.
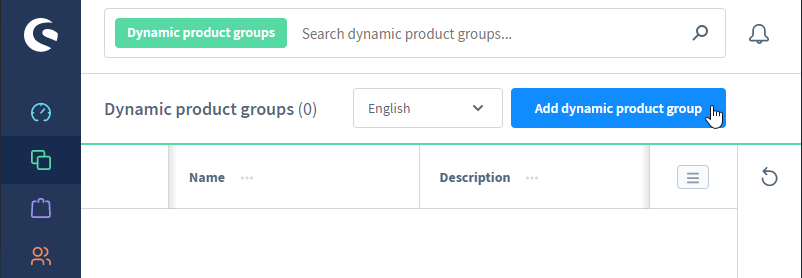
Click on "Add dynamic product group" to create a new dynamic product group as a database for the OUTTRA Export product comparison sales channel.
Configure the dynamic product group, assign a title, e.g. "OUTTRA Export" and a description, e.g. "All active products".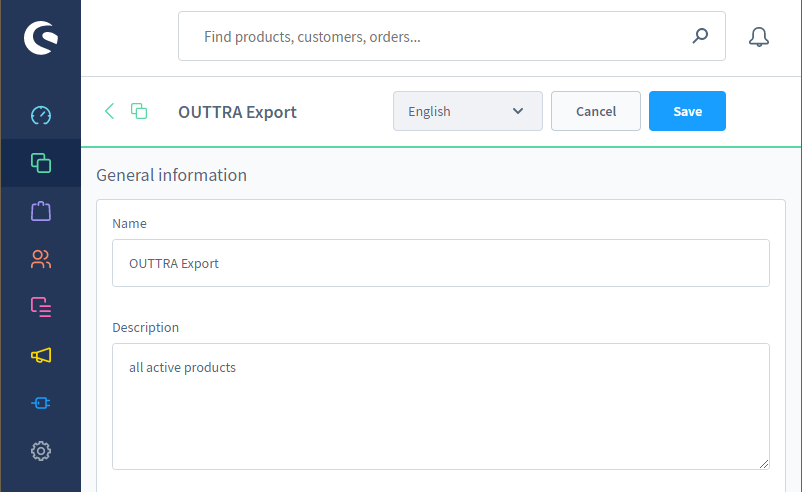
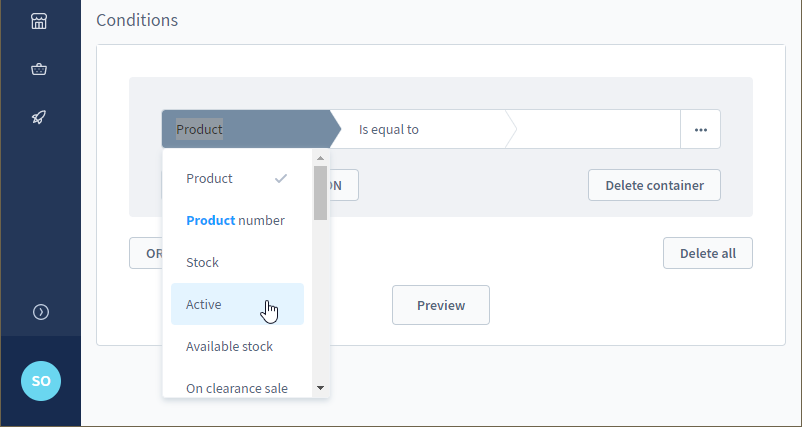
Configure the conditions which products should be included in the OUTTRA export. To include all active products, select the "Active" option under "Product".
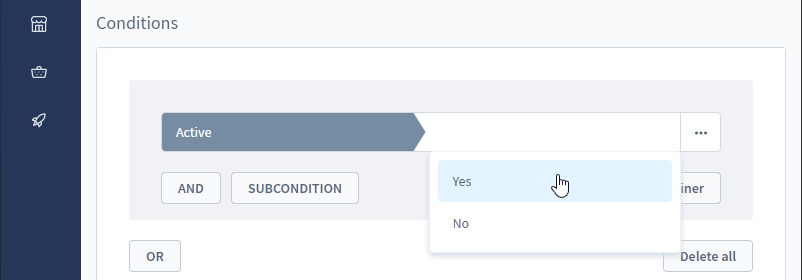
And set the condition to Active = YES
Finish the creation of the dynamic product group by clicking on "Save".
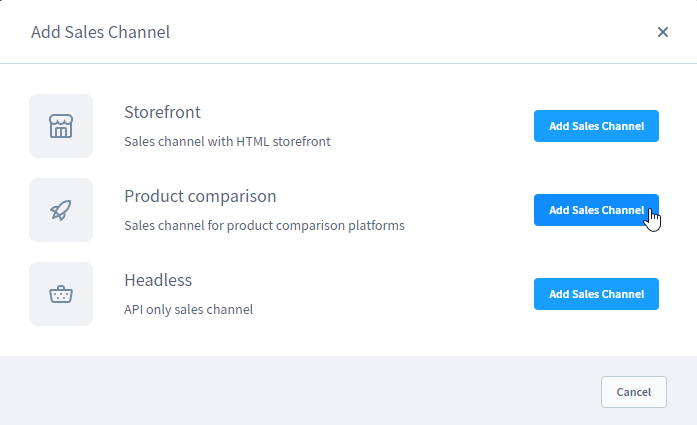
Continue by setting up the product comparison OUTTRA export as a sales channel.
To add another sales channel click on the plus (+) next to "Sales Channels" in your Shopware Administration.
Next to "Sales Channels" select the option "Add sales channel".
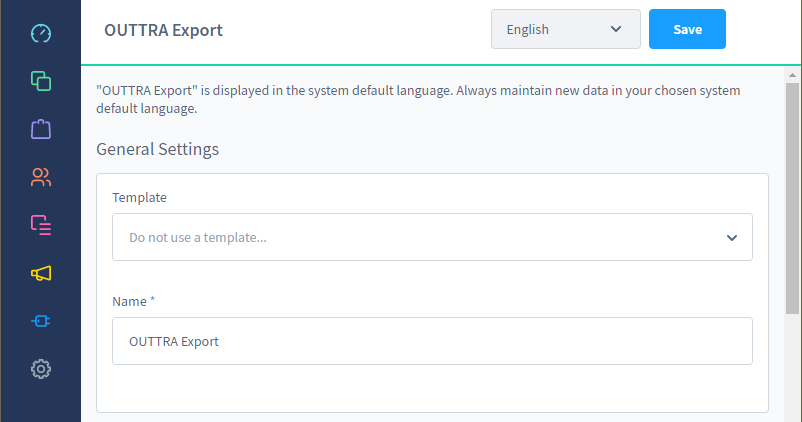
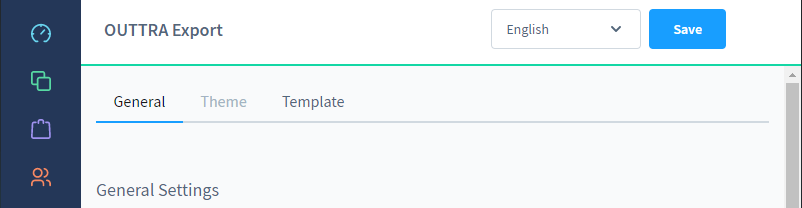
In the following you configure the sales channel, under basic settings you assign a name, e.g. "OUTTRA Export".
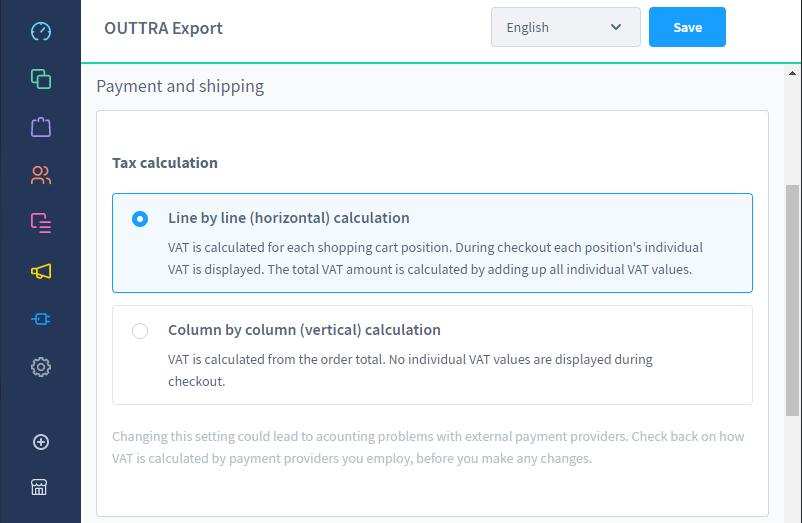
Under Payment and shipping, Tax calculation select Row by row (horizontal) calculation.
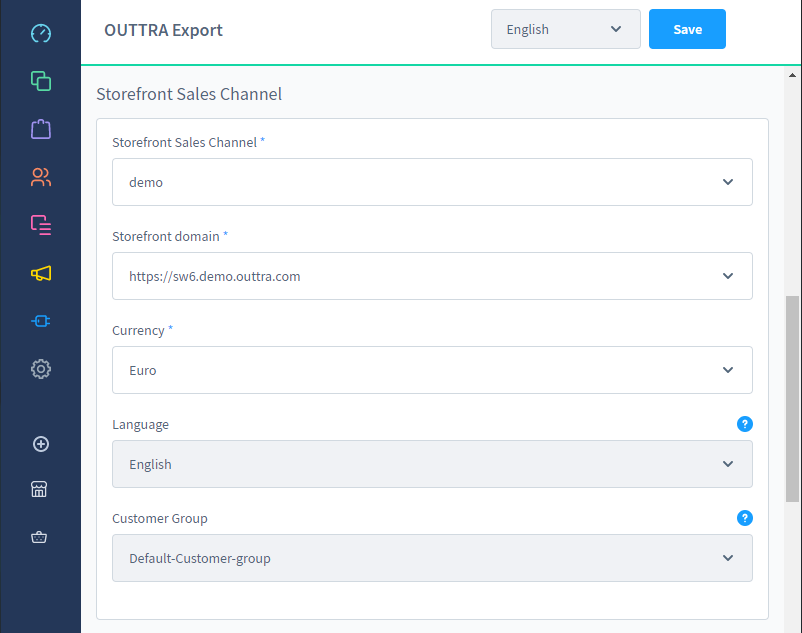
Under Storefront sales channel, select
- The storefront sales channel to which you want to link later.
- The storefront domain to which you want to link to later
- The currency
Under Product export, enter a file name, e.g. "outtra_export.csv", select "UTF-8" as character encoding and "CSV" as file format.
Activate the option "Export variants as own products", select "15 minutes" as generation interval, activate the option "Generate by scheduler".
As Dynamic product group select the previously created product group "OUTTRA Export".
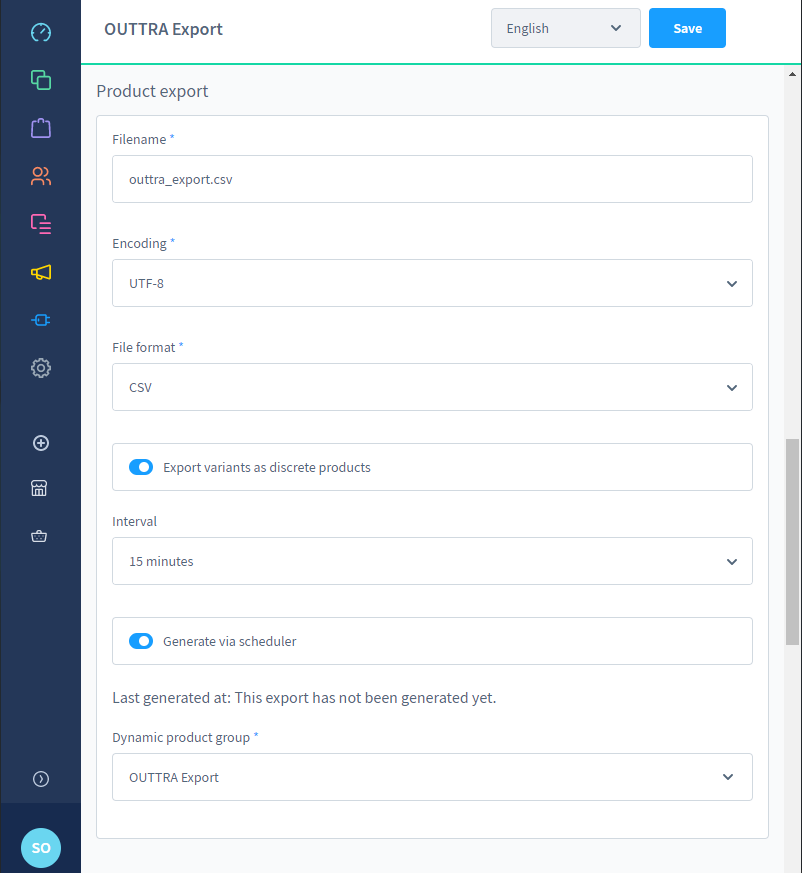
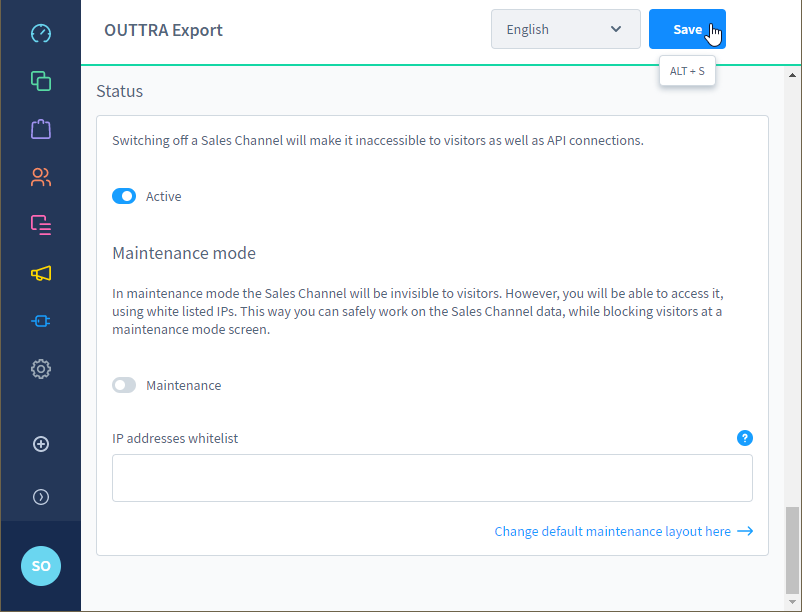
Set the status of the sales channel to "Active" and then click "Save".

After you save the sales channel for the first time, you will get more options for configuration. Click on the new option "Template".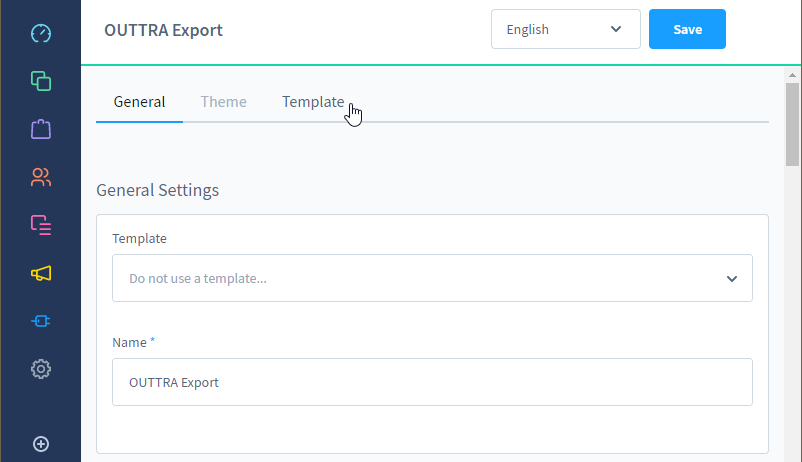
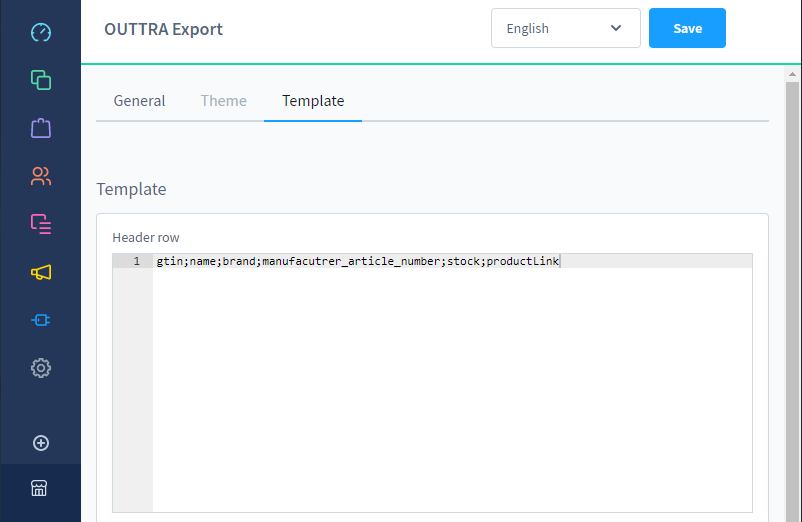
Under Template, configure the "Header" and enter the following line:
gtin;name;brand;manufacutrer_article_number;stock;productLink
Further down, under "Product line" enter the following line:
"{{ product.ean }}";"{{ product.translated.name }}";"{{ product.manufacturer.translated.name }}";"{{ product.manufacturerNumber }}";"{{ product.availableStock }}";"{{ seoUrl('frontend.detail.page', {'productId': product.id}) }}"
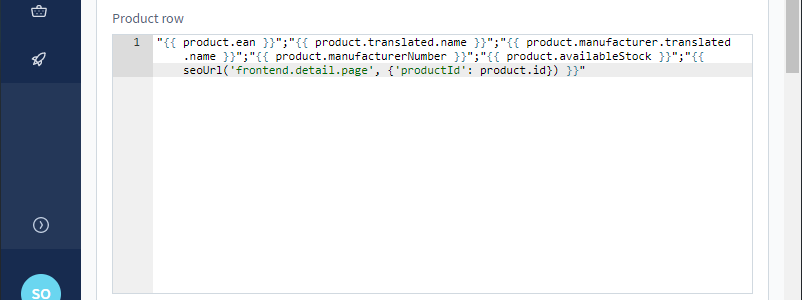
You can leave the footer blank. Click "Save" again to save the template entries.

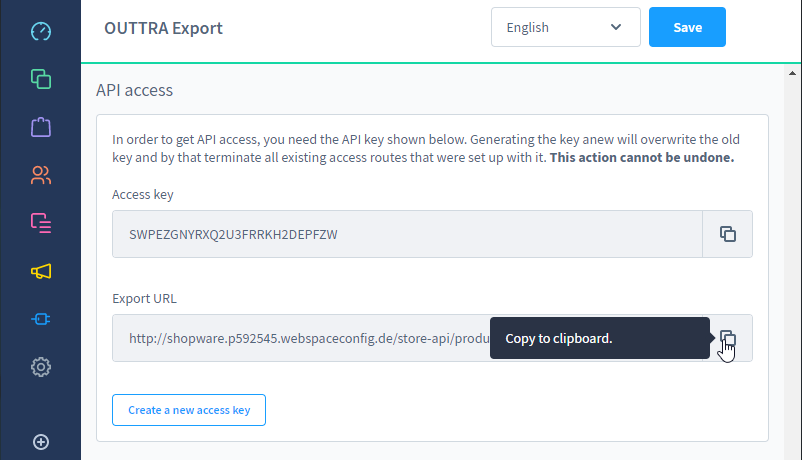
After you have saved the template options, scroll down under "General".
to the "API access" item.
Finally, copy the "Export URL" of the OUTTRA Export Feed for your store and email it to support-en@outtra.com.